

Have you seen a pop-up of text that appears when you hover or click an image, button, or even an icon?
Well, that is called a tooltip. It’s just a small, informative box that provides a bite-sized hint or content.
Though the tooltip is just small, it’s still a powerful design that enhances user experience and helps you communicate with your visitors.
So, if you’re using the WordPress block editor (Gutenberg), you’ll be glad to know that adding tooltips is both simple and flexible. You can use a plugin like GutenKit or a bit of HTML.
In this guide, I’ll walk you through the two easy methods on how to add tooltips in Gutenberg, step-by-step.
Quick Overview
Tooltips are small pop-up hints that enhance user experience, clarify content, and boost engagement. So, if you are using a Gutenberg WordPress website, you can add tooltips using a Gutenberg plugin like GutenKit or custom code with CSS/JS.
➡️ Use GutenKit if you are looking for an easy and simple approach with visual design flexibility. It has built-in styling options so you can customize the look and behavior of your tooltip without using a single line of code. This method is beginner-friendly and suited for experienced users who need a fast approach.
➡️ If you prefer a code-based approach and don’t want to rely on a plugin, you can add your tooltip to your Gutenberg website using plain HTML with minimal CSS/JS code.
Table of Contents
Why Add Tooltips in Gutenberg?
Tooltips are more than just visual aids; they serve real usability purposes. Here’s why you might want to use them:
- Enhance user understanding: Tooltips help clarify technical terms or abbreviations without cluttering the design.
- Improve accessibility: Users can hover or focus to get extra information without navigating away.
- Boost engagement: Interactive micro-elements like tooltips make your site more dynamic.
- Reduce confusion: They guide users through forms, buttons, or icons that may not be self-explanatory.
2 Methods to Add Tooltip in Gutenberg
There are two main ways to add tooltips in the WordPress Gutenberg editor:
- Using a plugin like GutenKit (no coding required)
- Using basic HTML code (manual method)
Let’s explore both approaches in detail.
How to Add Tooltip in Gutenberg with GutenKit
If you prefer a visual and code-free solution, the GutenKit plugin is your best choice. GutenKit is a powerful Gutenberg extension that adds new design modules, including an Advanced Tooltip feature.
Pre-requisites
Before you begin, make sure you have the following:
- A WordPress website running Gutenberg (default in WordPress 5.0+)
- The GutenKit plugin is installed and activated (pro version is required)
- A page or post ready to edit
Step 1: Enable the “Advanced Tooltip” Module
First, enable your Advanced Tooltip module from your WordPress dashboard. Go to GutenKit → Modules. Find the “Advanced Tooltip” and toggle it ON to activate the module.
Once enabled, you can start adding tooltips to any text, icon, or element within the Gutenberg editor.
Step 2: Open a WordPress Page/Post to Add Tooltip
In this tutorial, we’ll utilize an existing page built by GutenKit. Navigate to Pages → All Pages. Next, click Edit on the page where you want to add a tooltip.
The Gutenberg editor will open, which allows you to design your content visually.
Step 3: Select the Section or Element and Enable Tooltip
Decide on the section or element in your page where you can enable a tooltip. Click on any text, button, image or icon block.
On the right side, you can find the Gutenberg panel. Under the block settings, go to the Advanced tab and scroll down to the Tooltip section. Then, enable the tooltip toggle.
Enter your Tooltip Text. This text is what users will see when they hover or click over your image.
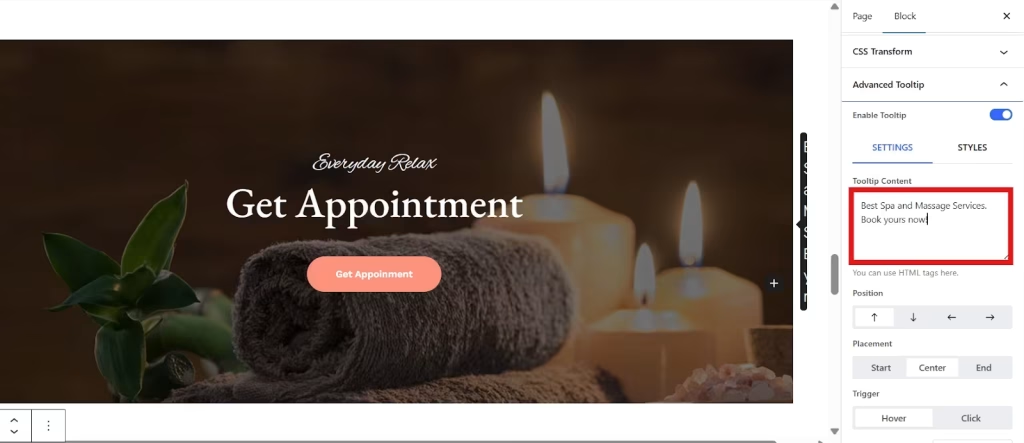
Step 4: Customize your Tooltip
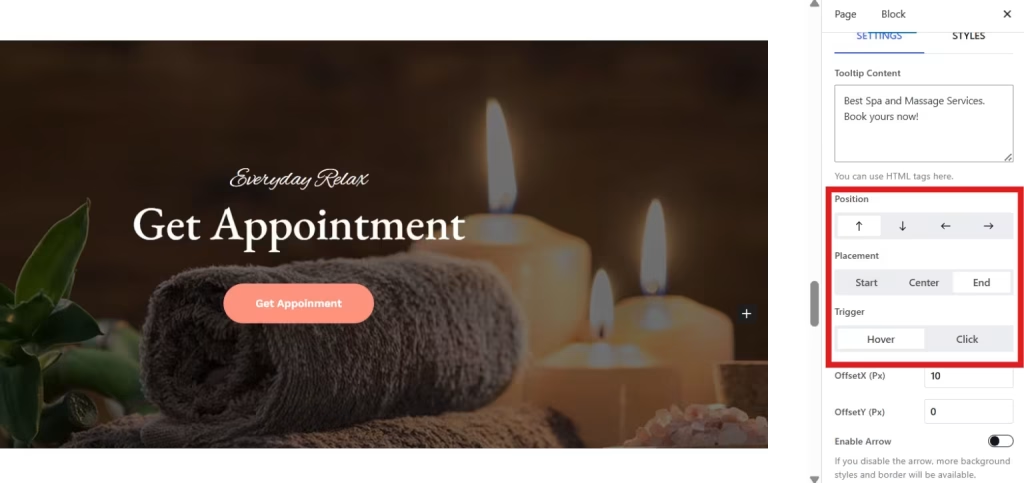
You can create a stylish tooltip by customizing its position and adding animation, delays, or styles as per your design preferences.
- Select position from Top, Bottom, Left, or Right.
- Choose the placement of your tooltip from Start, Center, or End.
- Set your tooltip trigger from Hover or Click.
Now, to level up the aesthetic appearance of your tooltip, you can add an animation from various options, like Fade, Scale, Shift Away, etc. Then, set its animation delay.
Additionally, you can enhance the appearance of your tool using the styles settings.
- Adjust the text alignment and width of the tooltip.
- Set the text color as well as the background color.
- Choose the typography of the tooltip text.
- Set the border and padding.

After you set up your tooltip and customize it according to your preferences, save the changes.
Step 4: Test it Live
Click Preview → Preview in New Tab. Hover over the element or section with your tooltip. If it appears smoothly and displays your message correctly, congratulations, your tooltip is live!
How to Add Tooltip in Gutenberg Using HTML
If you prefer not to use plugins or want full control over the code, you can add tooltips manually with simple HTML. It is also the fastest and most lightweight way to add a tooltip in Gutenberg, and it works well in all browsers.
Step 1: Open Your Gutenberg Editor
Go to your WordPress dashboard. Navigate to Posts → Add New or Pages → Add New to launch the Gutenberg block editor. In this tutorial, we’ll add tooltips to a new page.
Step 2: Add a Paragraph Block (or Any Text Block)
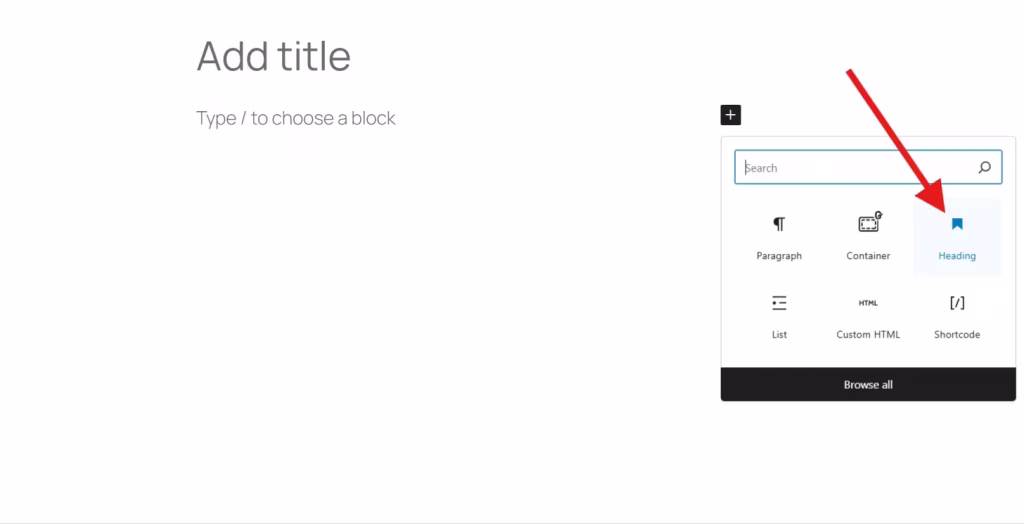
Once in the Gutenberg block editor, start by adding a Paragraph block (or a Heading, Button, or List block) where you want your tooltip.
Step 3: Click on the Three-Dot Menu
On the same text block, click the three-dot menu (⋮) in the block toolbar. Choose Edit as HTML.

Alternatively, you can use a Custom HTML block.
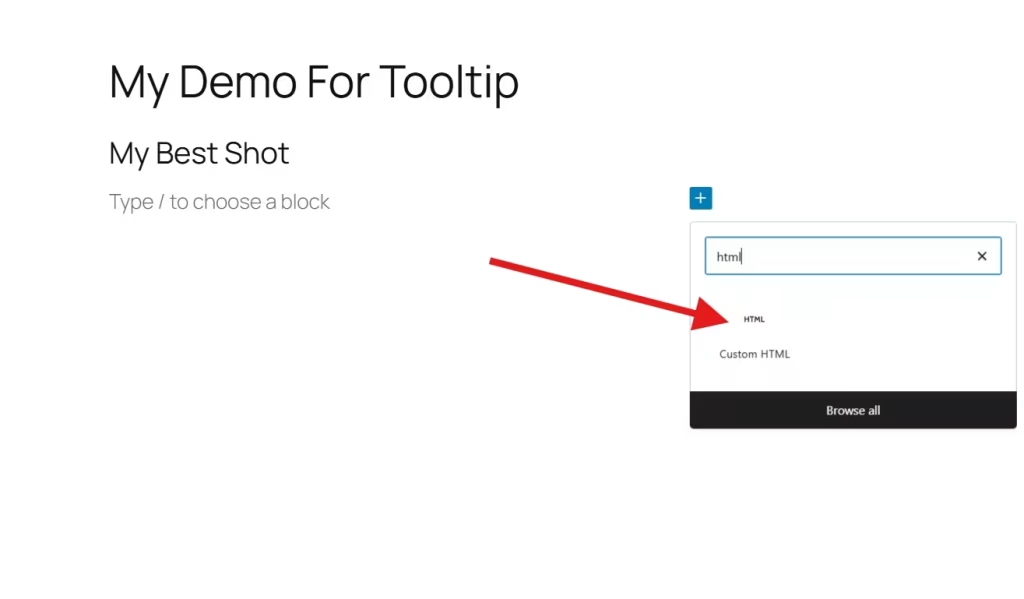
But in this guide, we’ll use the Heading block. Once you select Edit as HTML, your screen will show a code.
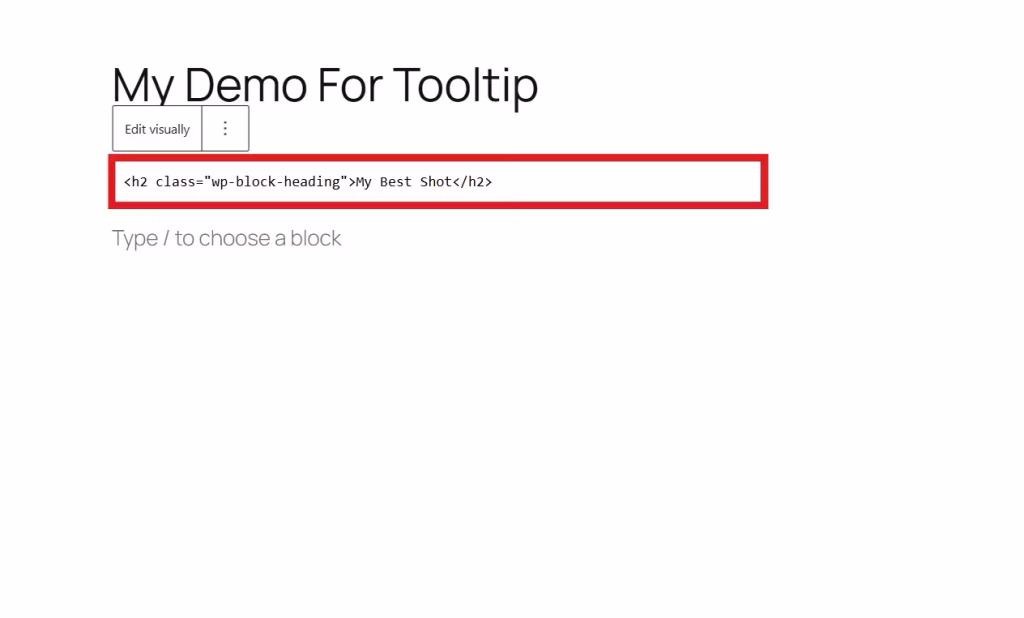
Step 4: Paste the Code
Now, add this simple tooltip HTML snippet at the box,
<p>
Hover over this
<span style=”position: relative; cursor: pointer;” title=”This is a tooltip example.”>
text
</span>
to see a tooltip.
</p>
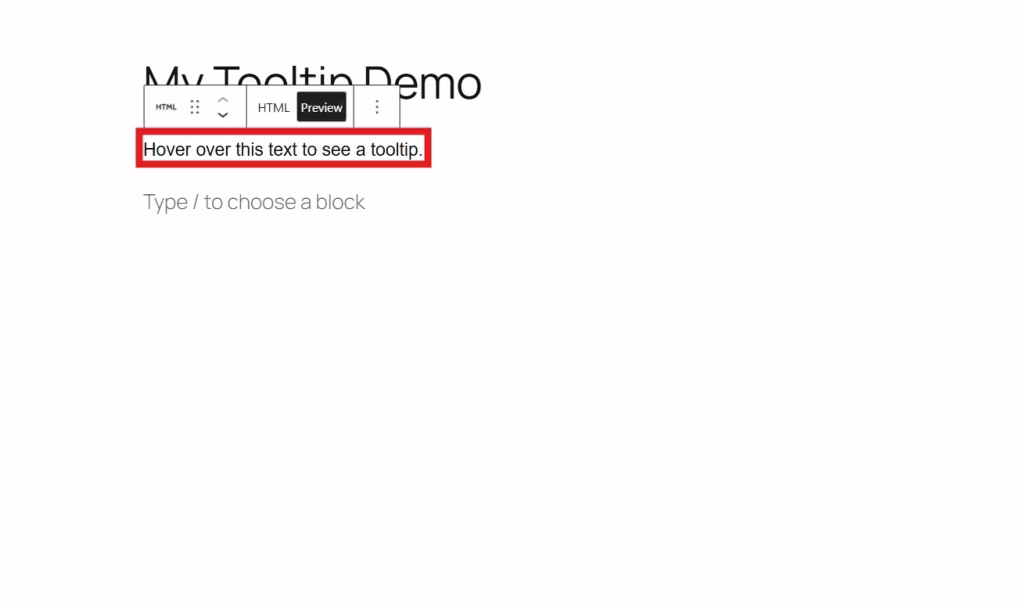
After you add the snippet code, switch back to the Visual editor.

When you return to the visual editor, you’ll see this phrase, “Hover over this text to see a tooltip.”
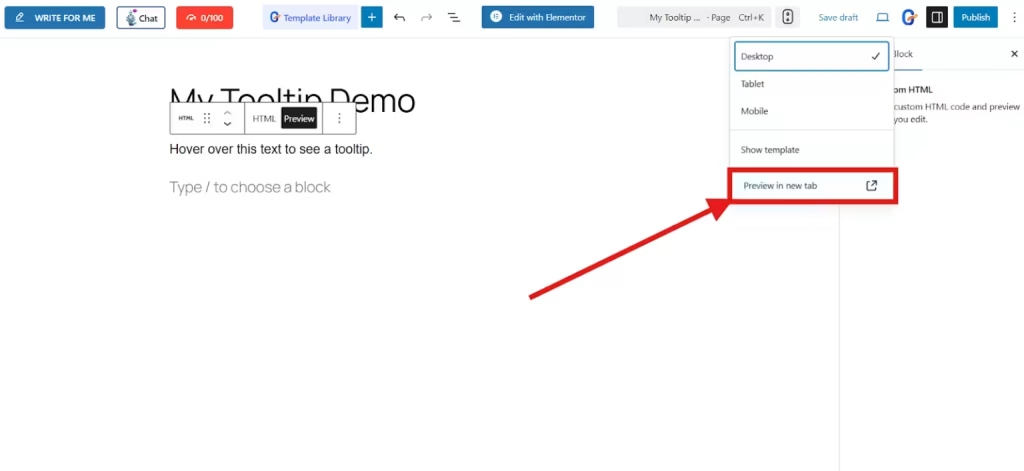
Next, preview your page in a new tab.
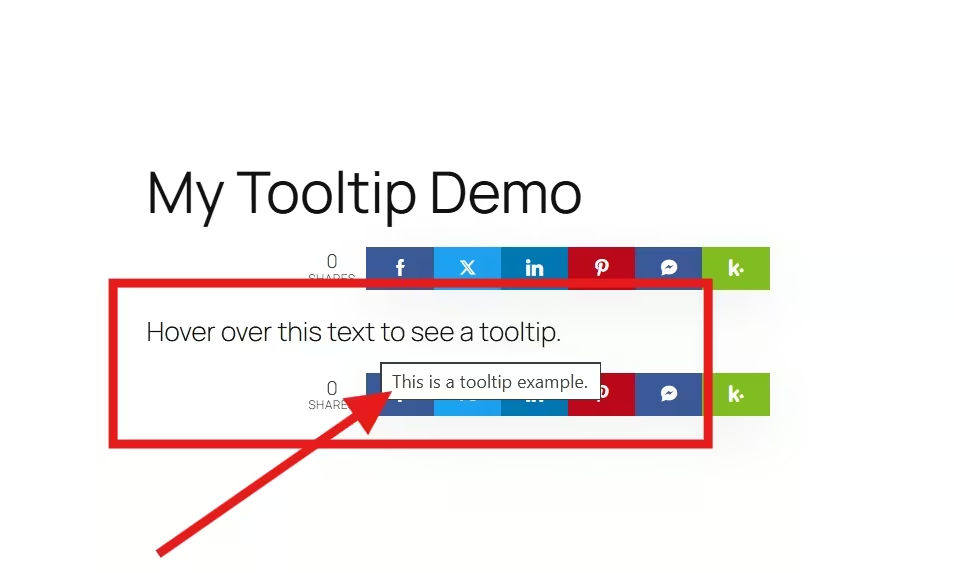
When you move your mouse over “Hover over this text to see a tooltip,” you’ll see a small tooltip box appear, which shows your message:
This is a tooltip example.
GutenKit vs HTML [Which One is Better]
| Criteria | GutenKit (Plugin Method) | Manual HTML (Code Method) |
|---|---|---|
| Ease of Use | Very easy. No coding required. Ideal for beginners and content editors. | Requires basic knowledge of HTML and CSS. |
| Setup Speed | Fast setup using the visual interface and modules. | Slower setup. Each tooltip must be coded manually. |
| Customization | Offers multiple styling options (color, animation, position) within the plugin interface. | Full control over design, behavior, and style through direct code edits. |
| Performance | Slightly heavier due to plugin scripts and styles loading sitewide. | Lightweight. No external assets or plugin overhead. |
| Dependency | Depends on GutenKit updates and compatibility with future WordPress versions. | Fully independent. Works without relying on any third-party plugin. |
| Scalability | Highly scalable. You can quickly add tooltips to many blocks. | Repetitive if you have to add tooltips across multiple elements manually. |
| Control | Limited to the plugin’s built-in options. | Full control. You can add custom HTML, CSS, or JavaScript for advanced effects. |
| Visual Editing | 100% visual as you can preview and adjust tooltips in real-time. | Code-based. Requires switching to “Edit as HTML” mode to view or edit. |
| Learning Curve | Minimal – plug-and-play approach. | Moderate. You need to understand HTML structure and tooltip styling. |
| Performance Impact | May add a minor increase in page load time due to plugin assets. | Minimal impact with clean and efficient HTML/CSS execution. |
| Best For | Non-technical users, designers, or editors who want convenience. | Developers, performance-focused users, or advanced site owners. |
Pros and Cons Summary
| Method | Pros | Cons |
|---|---|---|
| GutenKit (Plugin) | – No coding required – Quick and visual setup – Built-in styling and animation – Easy tooltip management | If the plugin is disabled or removed, tooltips may not work. |
| Manual HTML | – 100% customization control, but with extra coding hassles. – No plugin dependency – Works on any theme or site | – Requires coding knowledge – Time-consuming for large-scale use – Manual updates needed – Accessibility must be handled manually – Can create responsive issues |
If you value simplicity and visual design flexibility, GutenKit is the better option. It allows you to create tooltips directly within the Gutenberg editor using an intuitive and no-code interface. Additionally, it has built-in styling options to customize the look and behaviour of your tooltip without a single CSS or JavaScript, compared to the other method. This implementation is fast and has a visual workflow.
On the other hand, if you prefer a code-based approach that doesn’t rely on plugins, using plain HTML (and minimal CSS/JS) is the perfect choice. This method keeps your site free from additional dependencies. It’s especially suitable for developers who are comfortable writing code with minimal overhead.
FAQs
1. Can I add tooltips to images in Gutenberg?
Yes! In GutenKit, simply select the image block and enable the tooltip option.
2. Are tooltips mobile-friendly?
Most plugins like GutenKit offer responsive tooltip behavior.
3. Do I need coding skills to use GutenKit?
No. GutenKit’s Advanced Tooltip feature is completely visual, no coding required.
4. Will tooltips affect website speed?
Not significantly. Using a plugin like GutenKit will help to add lightweight tooltips with minimal loading resources.
Final Thought
Adding tooltips in Gutenberg can instantly make your content more interactive and informative.
If you’re a beginner, content creator, or designer who wants a fast, visual tooltip setup with no coding, choose GutenKit.
On the other hand, go with HTML if you are well-versed in coding.
Start adding tooltips today and make your WordPress website more engaging, user-friendly, and professional.
Leave a Reply