
Setting up a professional education site is the very first step to sharing knowledge with students worldwide. The perk of using WordPress is that you don’t have to be a coder to create and live your online educational platform.
Thanks to WordPress and no-code plugins like GutenKit, anyone can create a fully functional education site in a few hours. GutenKit is an ultimate block plugin for Gutenberg that lets you build custom website by dragging-and-dropping with zero coding skills.
In this guide, we’ll reveal the entire process of creating an education website using GutenKit’s pre-built templates and customization options. So, let’s dive in to launch your educational site without coding expertise…
Quick Overview:
In this tutorial, you will learn how to create education website using block template. To follow this guide, first install GutenKit that comes with prebuilt education block templates.
Needed tools: GutenKit free, GutenKit pro (If want to use premium templates and blocks)
Follow the steps after installing GutenKit to create custom education website:
- Create a page.
- Import education template.
- Template content customization.
- Style adjustments.
- Live education site.
- Add nav menu, faq, etc.
Table of Contents
Prerequisites for creating an education website without coding
Before diving into the process of creating an online education form in WordPress, you need to find a user-friendly solution. This guide will be demonstrated using GutenKit as it’s a no-code block plugin for website creation. Before installing the below mentioned tools, configure domain, hosting, and WordPress installation.
Then, install the following required tools that you will need for creating an education website in WordPress:
Steps to create an education website in the WordPress block editor
After downloading and setting up all the prerequisite plugins on your WordPress dashboard, you have to follow the steps below to add an education site using GutenKit’s prebuilt block templates.
GutenKit, a Gutenberg block plugin, comes with 900+ pre-made patterns and templates for smooth website creation and customization. These built-in templates allow you to instantly generate a WP site with minimal effort and bring the necessary tweaks.
So, follow the step-by-step process to learn how to create an education website in WordPress block editor with GutenKit:
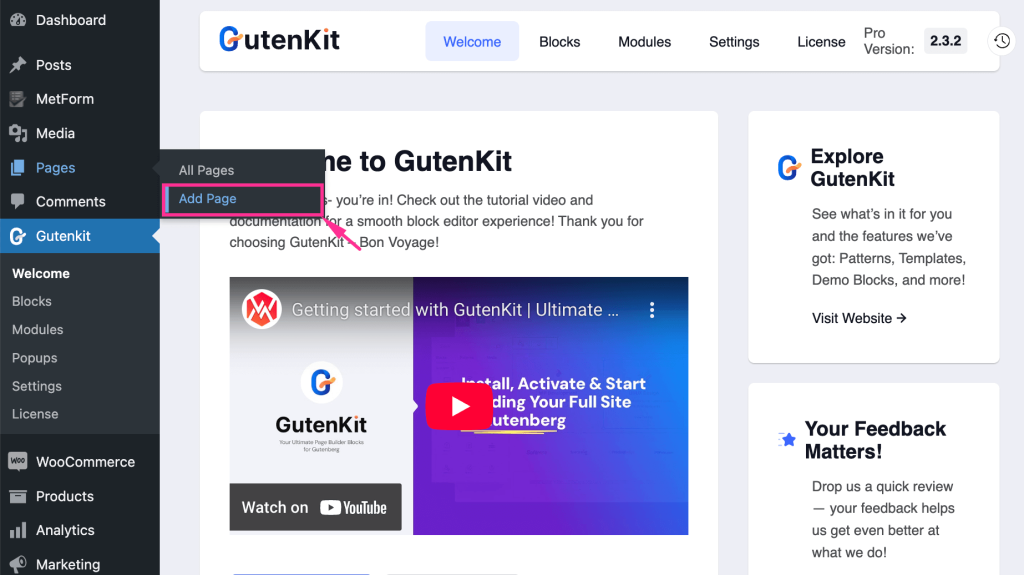
Step 1: Add a page for the education site.
First, visit your WordPress dashboard and navigate to Pages >> Add Page for adding education site in WordPress using GutenKit’s block templates.
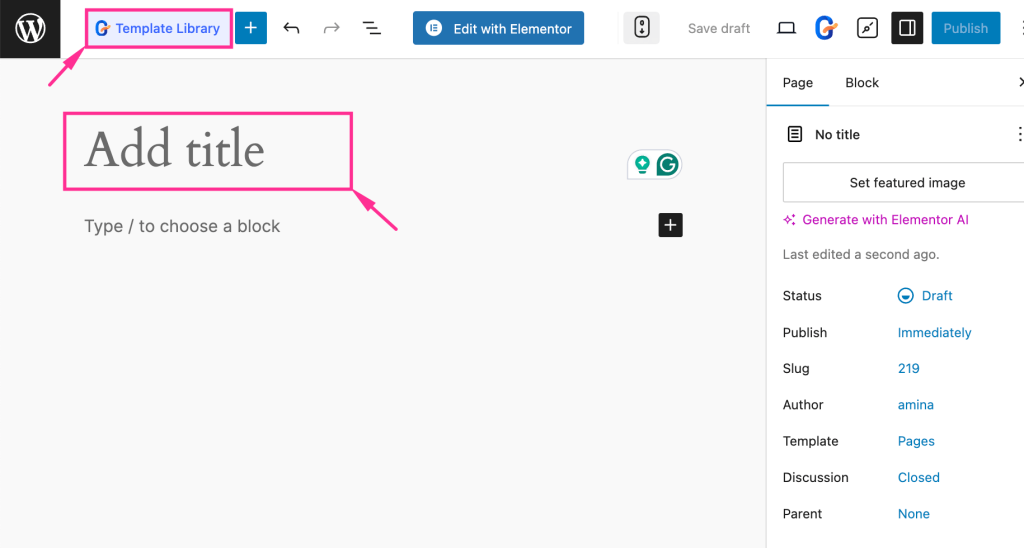
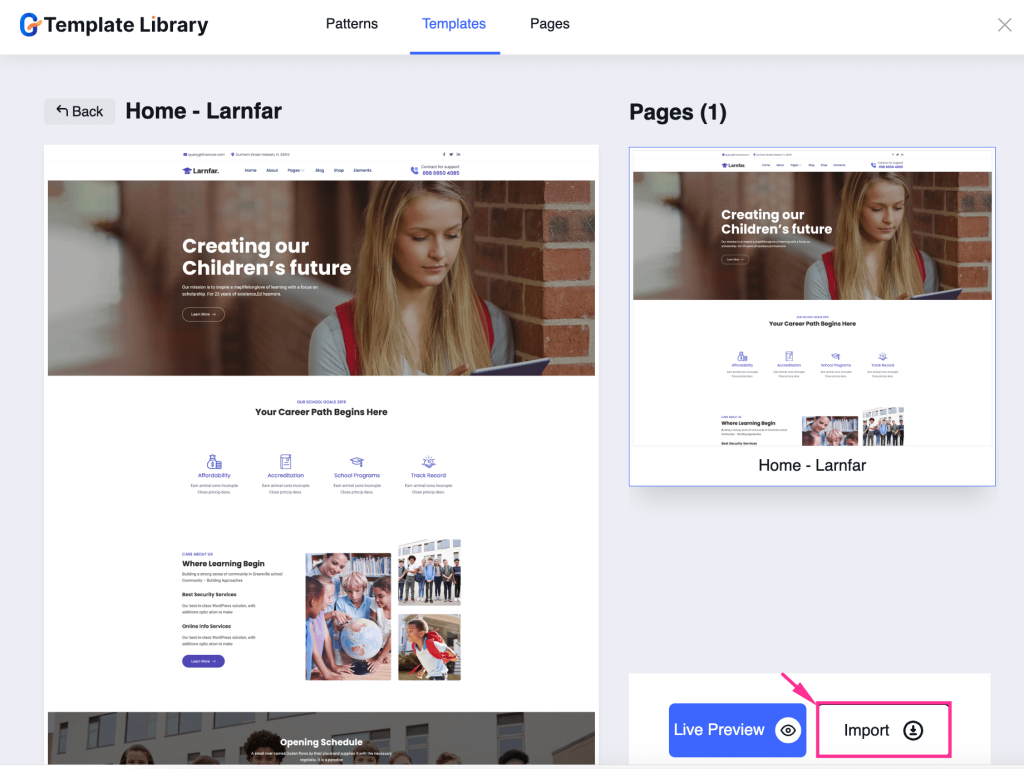
Step 2: Import the education template.
After redirecting to a new page, you need to add a title to your page and press the “Template Library” button to access all block templates provided by GutenKit.
Thus, GutenKit’s Template Library will pop up from where you need to navigate to the “Templates” tab and select “Education” as the Category. Then, click the template that you want to import.
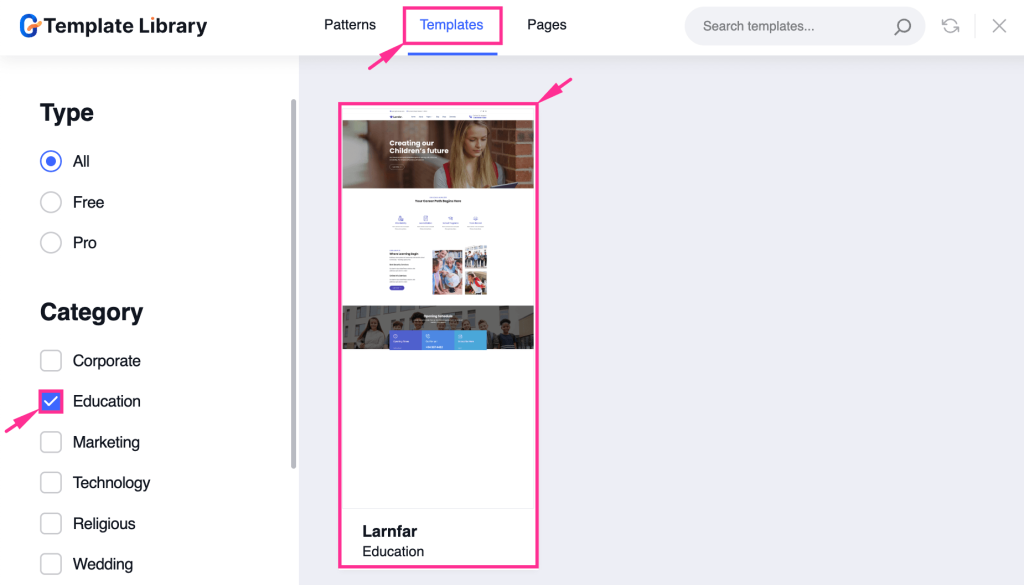
After that, press the “Import” button to import the selected GutenKit’s Education template. Also, beside the Import button, you will find a preview button to check how it actually looks.
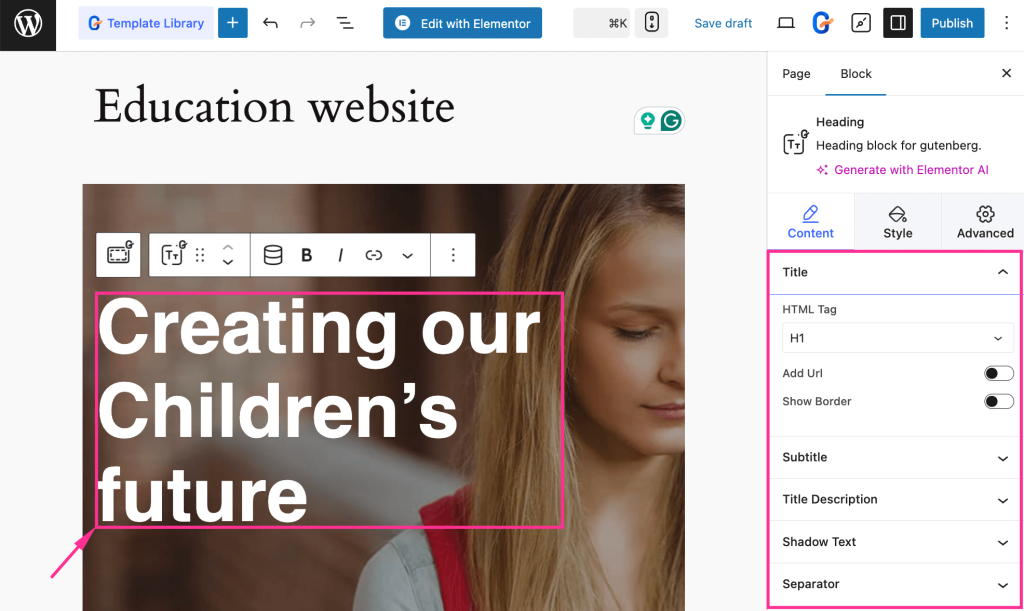
Step 3: Customize the content of the education template.
In the third step, you have to customize the content of your education template. Just select the section that you want to customize and directly change the content.
Also, you will find additional content settings on the right side, by which you can adjust HTML Tag, shadow text, border, etc. of your content.
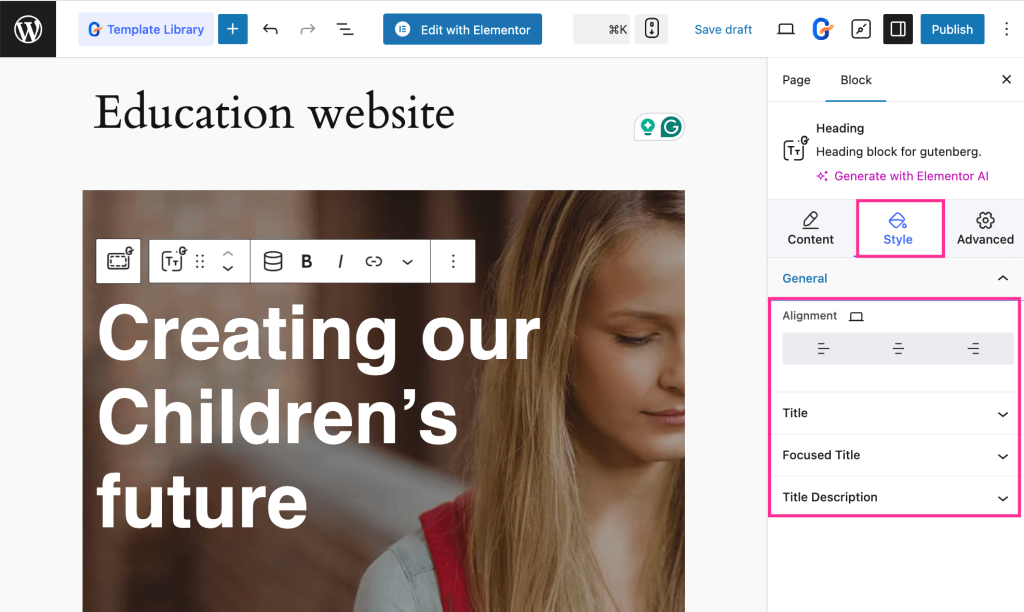
Then, navigate to the “Style” tab and adjust Alignment along with the Style of your Title, Focused Title, and Title Description.
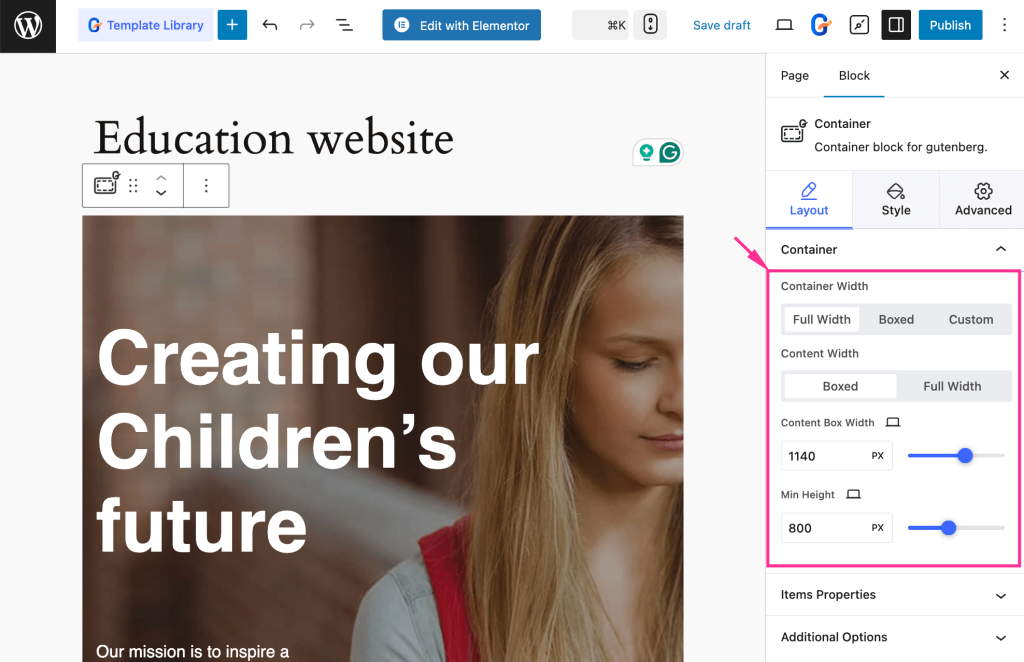
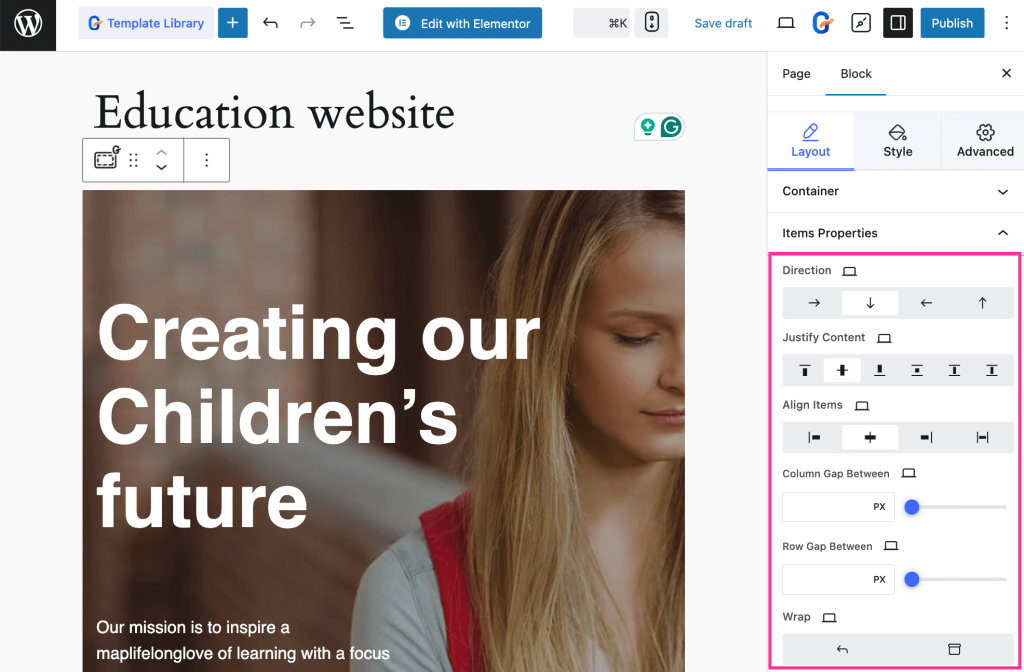
Step 4: Edit the layout of education template.
In the fourth step, you have to adjust each section by selecting it, and you will find all controls for Layout, Style, and Advanced on the right side.
At first, expand the “Container” tab and customize Container Width, Content Width, Content Box Width, and Min Height of the Container.
Then, open up the Items Properties tab and edit Direction, Justify Content, Align Items, Column Gap Between, and Wrap for Items Properties.
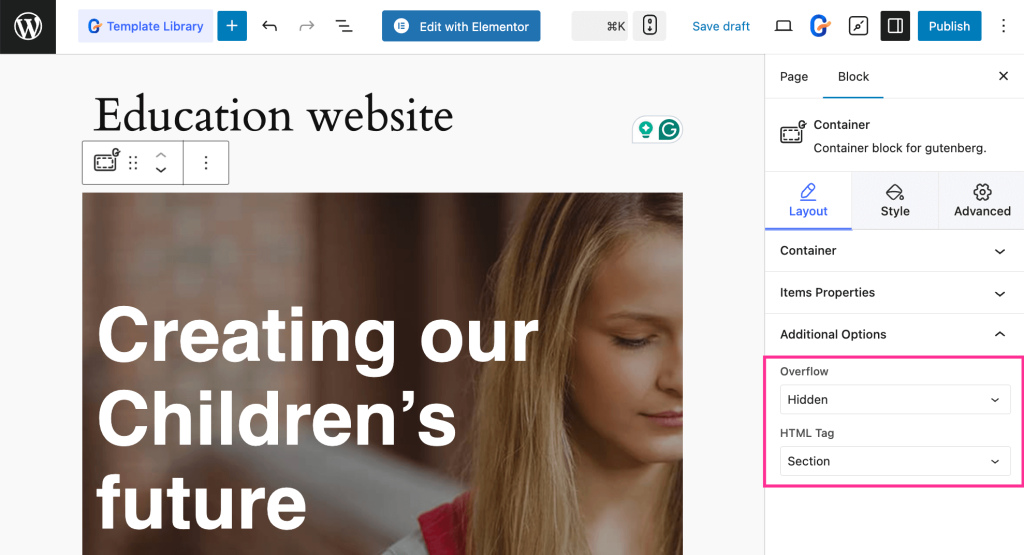
Next, expand the “Additional Options” tab and adjust Overflow and HTML Tag from the dropdown menu.
Now, navigate to the “Style” tab and open up “Background” to customize Background Type, Image, Image Size, Position, Attachment, Repeat, Display Size, and Parallax Scrolling Effects.
Similarly, adjust the style of Background Overlay, Border, and Shape Divider with the shown control settings on the right side. Later edit one section, customize other sections according to your requirements.

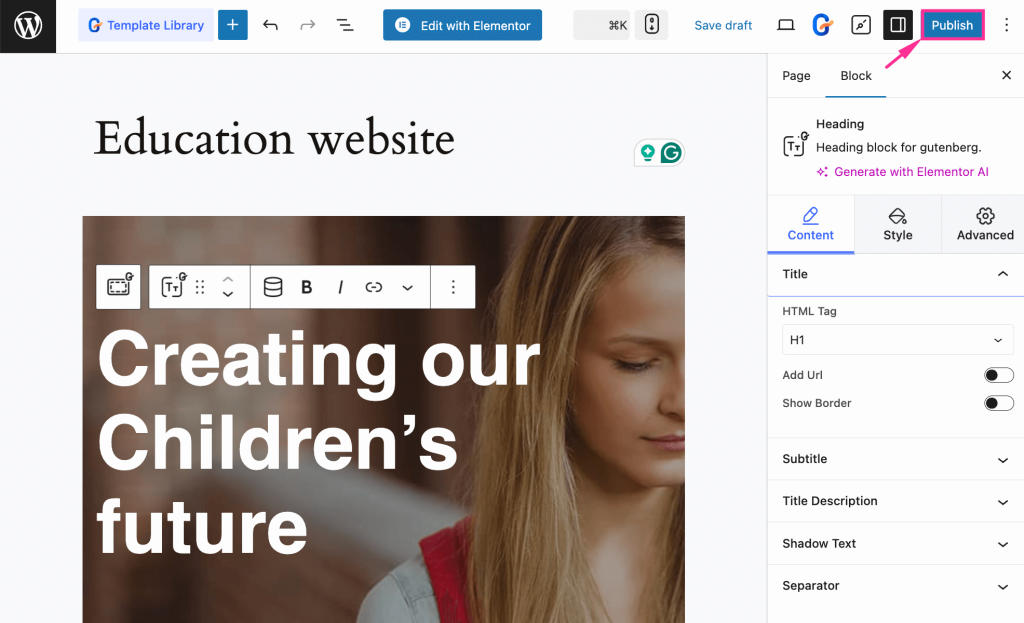
Step 5: Publish education site.
In the last step, you have to live your education site built with GutenKit’s premade template. For that, hit the “Publish” button to live your education website.
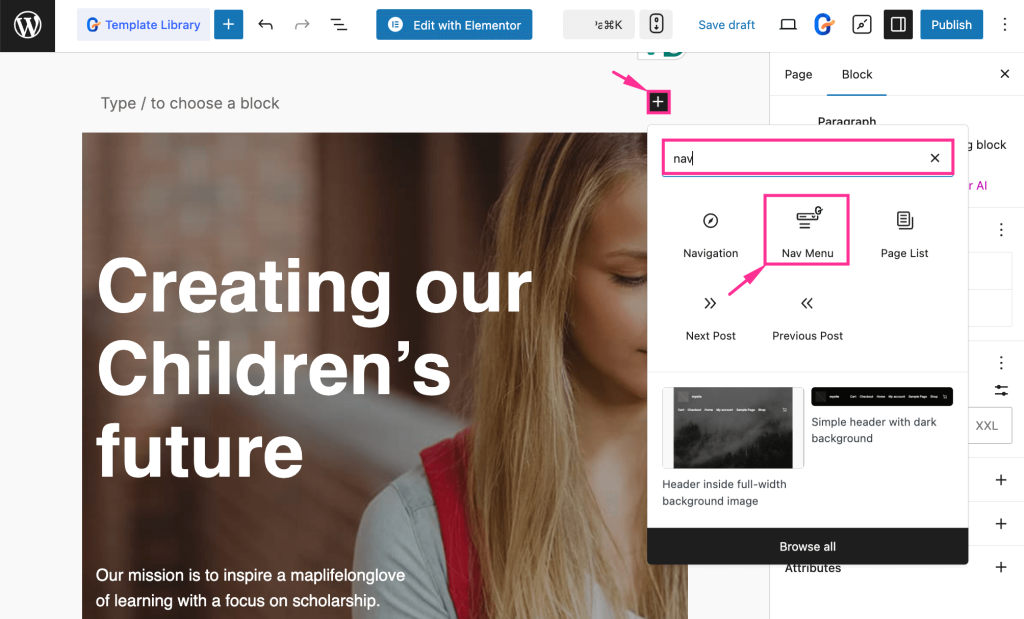
Step 6: Add sections such as nav menu, faq, etc.
You can also add additonal sections like nav menu, faq, privacy policy, etc. using GutenKit’s block. GutenKit offers dedicated blocks for these sections.
Just you need to search for the block after pressing the “+” button and add it to your website.
FAQs
Do you need coding for building education website?
No, you don’t need any coding skills. With a no-code WordPress plugin like GutenKit and pre-built templates, you can create professional templates in no time.
Which Gutenberg plugin is best for education website?
GutenKit is one of the growing block plugins that comes with template support. Also, its advanced blocks let you craft an education site from scratch or with template.
Are education website templates fully customizable?
Yes, WordPress templates are fully customizable. If you are using GutenKit, you can add a custom education template according to your preference using all the advanced controls.
Wrapping up
Since you have gone through the easy solution of building an education website, it’s time to execute it. However, if you want to customize your site, GutenKit gives you control of everything.
Its templates will provide you with pre-designed layouts that give you full control of customization. You just have to import one and edit or customize according to your preferences.
The easy process is shared. Now, it’s your turn to set up your education website and start sharing knowledge with the world.
Leave a Reply